| HTML |
|---|
<div style="background-color: yellow; border: 2px solid red; margin: 4px; padding: 2px; font-weight: bold; text-align: center;">
This page was moved to <a href="https://github.com/CERTCC/tapioca/wiki/Tapioca-Tutorials">https://github.com/CERTCC/tapioca/wiki/Tapioca-Tutorials</a>
<br>
Click in the link above if you are not automatically redirected in 3 seconds.
</div>
<meta http-equiv="refresh" content="3; URL='https://github.com/CERTCC/tapioca/wiki/Tapioca-Tutorials'" />
|
Overview
From a software analysis perspective, network sniffing and MITM proxies can uncover several types of software issues:
...
CERT Tapioca can test all three of these scenarios.
Virtual Machine Configuration
First, get the CERT Tapioca OVA. This is a standardized format that is supported by most virtualization products.
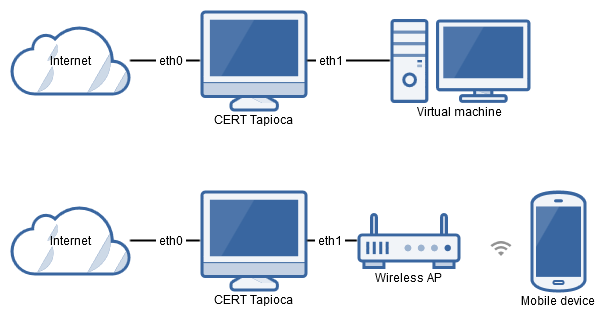
Once imported into your virtualization software of choice, it is a good idea to make a snapshot of the virtual machine before making any changes. The CERT Tapioca virtual machine has two ethernet adapters. eth0 is the WAN side, which should be connected to the internet. eth1 is the LAN side, which should be connected to the application to test. This could be a virtual network for connecting to other virtual machines, or this can be bridged to a physical network. For example, bridging eth1 to a wireless network adapter can allow testing of applications on a physical device that has WiFi capabilities.
For VMware products, eth0 appears to match up with the first listed network adapter. For VirtualBox, it appears that eth0 matches up with the second network adapter listed in the virtual machine configuration. Either way, be sure that the internet connection is configured to connect to the eth0 adapter. From the Tapioca VM perspective, eth0 is the one that gets its IP address using DHCP, and eth1 is the adapter that provides an IP address to the client using DHCP. If your Tapioca VM cannot access the internet, you may have the network adapters misconfigured.
Also note that the internet side of CERT Tapioca must be a direct internet connection, or an internet connection that does transparent proxying. mitmproxy does not allow both transparent interception of client traffic at the same time as explicitly specifying an upstream proxy.
Using CERT Tapioca
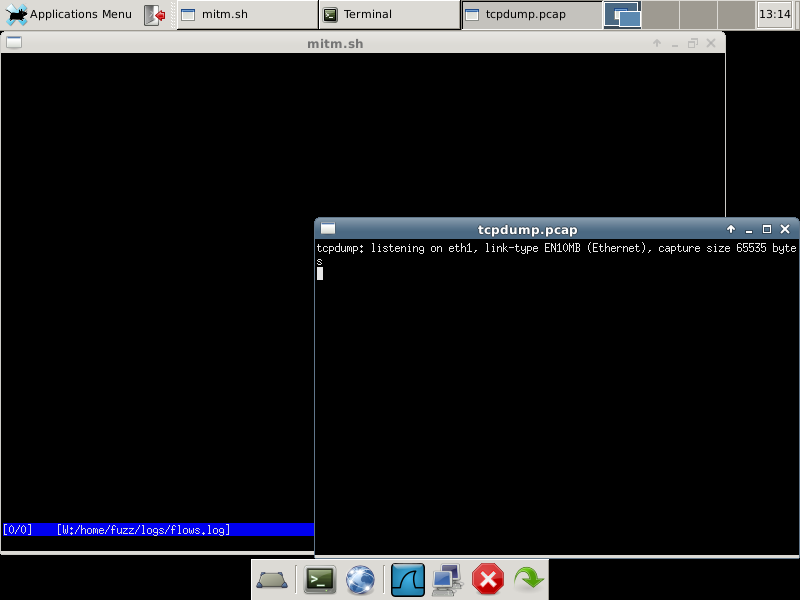
When you first power up Tapioca, you'll see a screen similar to this:
Here we have a basic Xfce desktop environment. The default fluxbox window manager that comes with UbuFuzz is a bit too lightweight for our needs. In the basic environment, mitmproxy and tcpdump are both started automatically, logging data to the ~/logs directory.
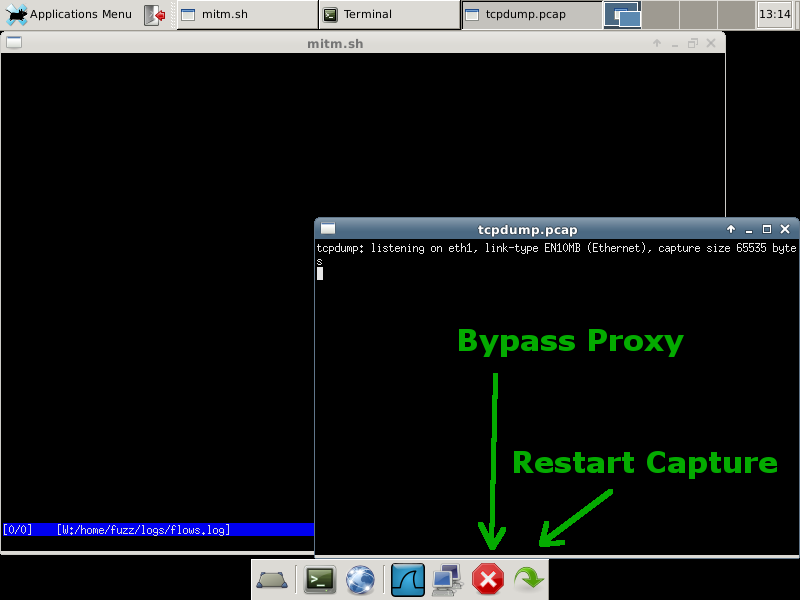
On the bottom toolbar, there are two icons that you will likely use the most:
If you want to bypass the mitmproxy software, click the red stop sign icon. This function adjusts the iptables rules to simply perform NAT. This function can also allow you to visit https sites and have a valid certificate. The green arrow button clears out the logs and restarts both mitmproxy and tcpdump, configuring iptables to route web traffic through the proxy.
CERT Tapioca In Use
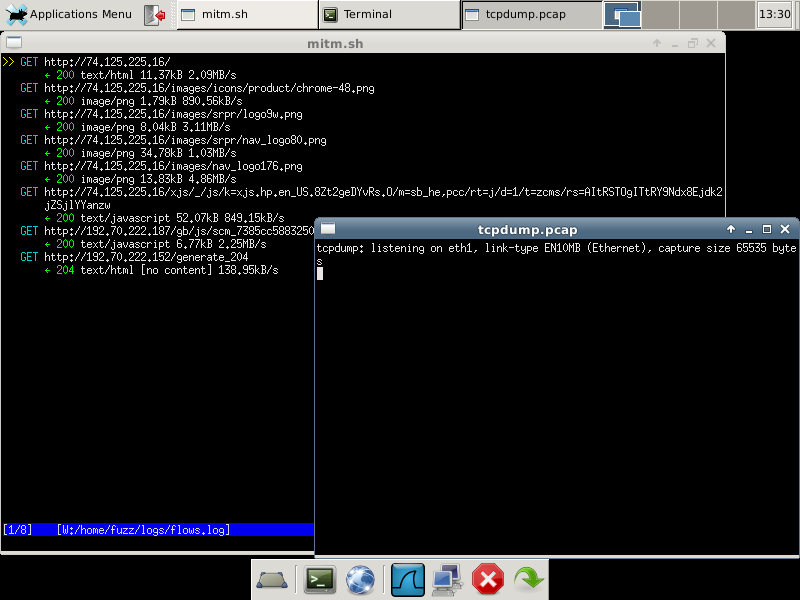
Let's try using the CERT MITM proxy VM by connecting another VM to the same virtual network as the local side of the proxy VM. We fire up our horribly outdated Internet Explorer 6 browser and go to www.google.com:
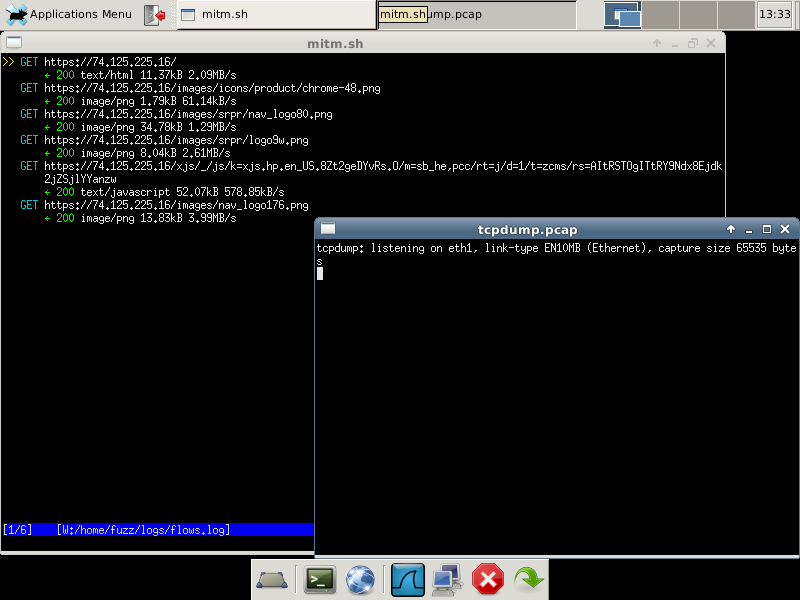
Here we see several http GET requests in the mitmproxy window. What if we try to visit https://www.google.com instead?
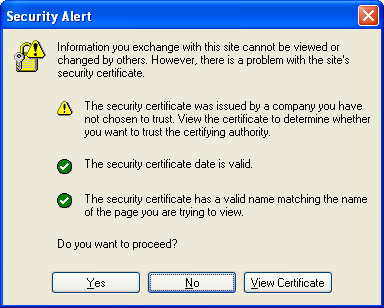
It's good that we get this warning. It means that our client software is checking the validity of SSL certificate chains when making HTTPS network connections. In this particular case, it's saying that the certificate was not issued by a root certificate authority that the browser already trusts. If we don't accept this warning, then mitmproxy will not log any HTTPS requests.
If we click Yes, then mitmproxy will log our traffic:
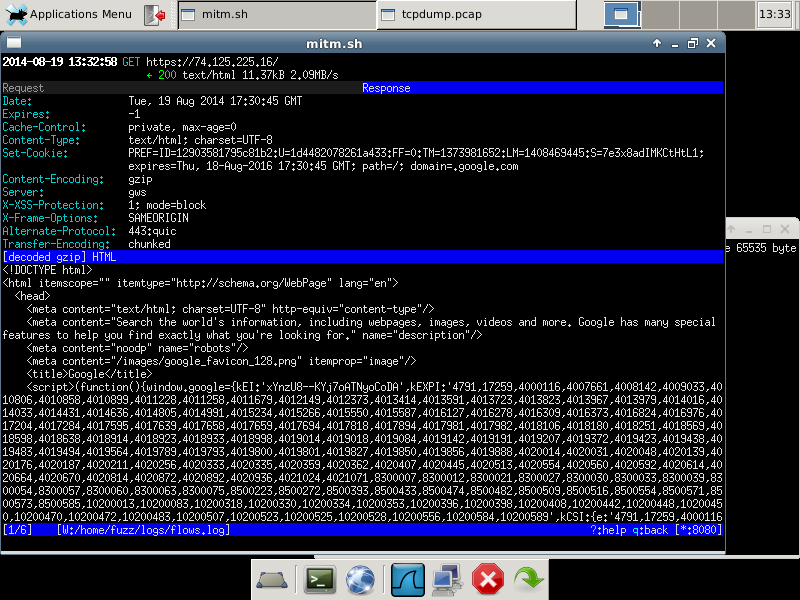
Then we can actually dive into any of the requests to see the details:
Here we see the content that was transferred over the encrypted https connection. We see the traffic because mitmproxy communicates securely with the web server, decrypts the traffic, and then re-encrypts the traffic using a dynamically generated certificate using its own root CA certificate.
Interpreting Results
As I mentioned previously, if you ever see an https:// URL in mitmproxy, you're either dealing with an application that fails to validate SSL certificate chains or you have manually accepted the invalid certificate. We can easily check for this programmatically:
grep "5:https," ~/logs/flows.log
This command determines whether the client successfully sent or retrieved data through the HTTPS connection.
Intercepting All HTTPS Traffic
Rather than investigating which applications properly validate SSL certificate chains, if our goal is to investigate all HTTPS traffic coming from an application, we need to change our client platform by importing the mitmproxy root CA certificate. The root CA certificate used by mitmproxy is available in several formats in the ~/certs directory in the CERT Tapioca VM. The folks at CAcert have provided guidelines for how to import a root CA certificate in a variety of platforms.
Note:
The certificates provided in the ~/certs directory have expired on July 10, 2016. To have Tapioca use updated certificates, please see CERT Tapioca 1.0 and Expired CA Certificates.
After performing this change, the mitmproxy certificates will be available in the ~/.mitmproxy directory.
Upgrading mitmproxy
mitmproxy is periodically updated to add new features and fix bugs. For example, versions of mitmproxy that were released after CERT Tapioca include the ability to interact with the terminal using the mouse. To get the latest version of mitmproxy installed on CERT Tapioca:
| Code Block |
|---|
wget https://bootstrap.pypa.io/ez_setup.py
sudo python ez_setup.py
sudo apt-get install libjpeg-dev
sudo pip install --upgrade pip
sudo pip install --upgrade mitmproxy |
